Add Firebase to your iOS app
Register your iOS app
Open the Project Overview page in your Firebase project and launch the setup workflow via the iOS icon ().
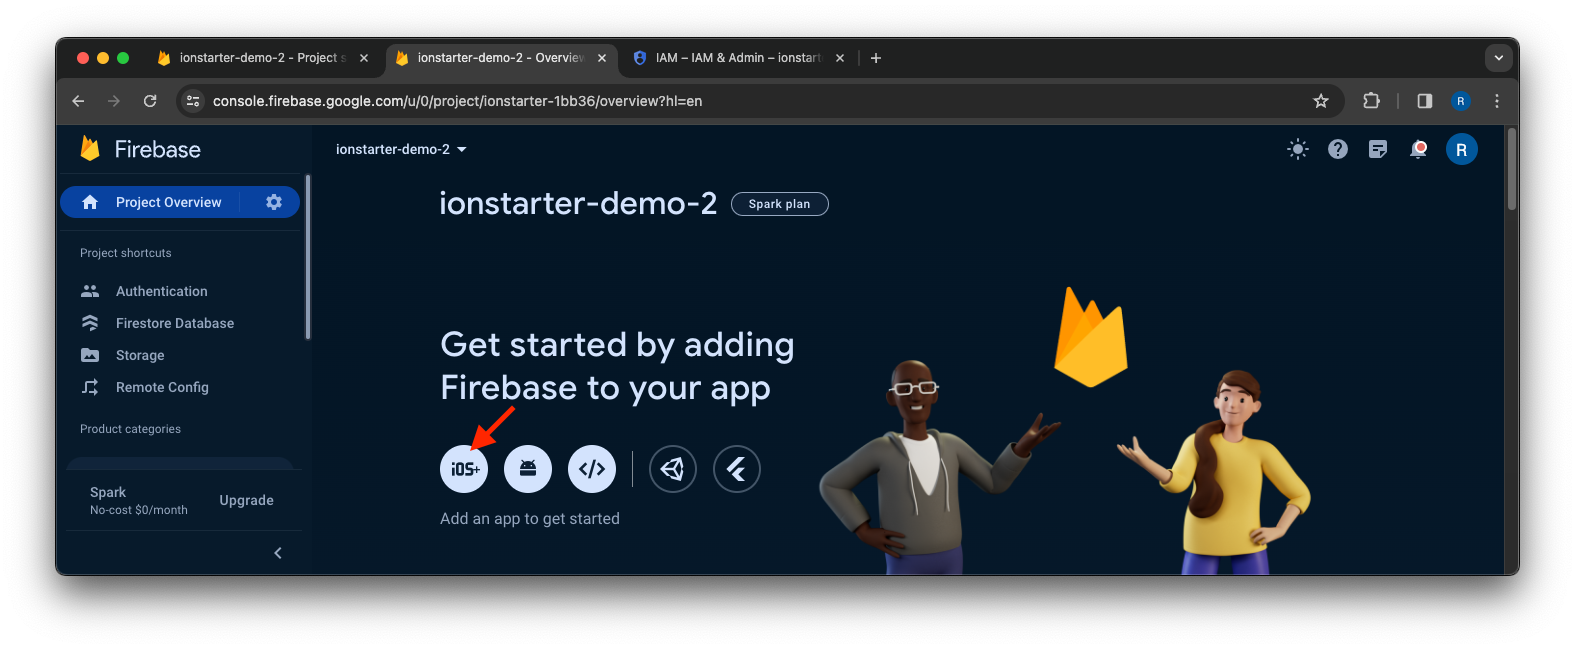
If you've already added an app to your Firebase project, click Add app to display the platform options.
Next, you need to provide various information about your app.
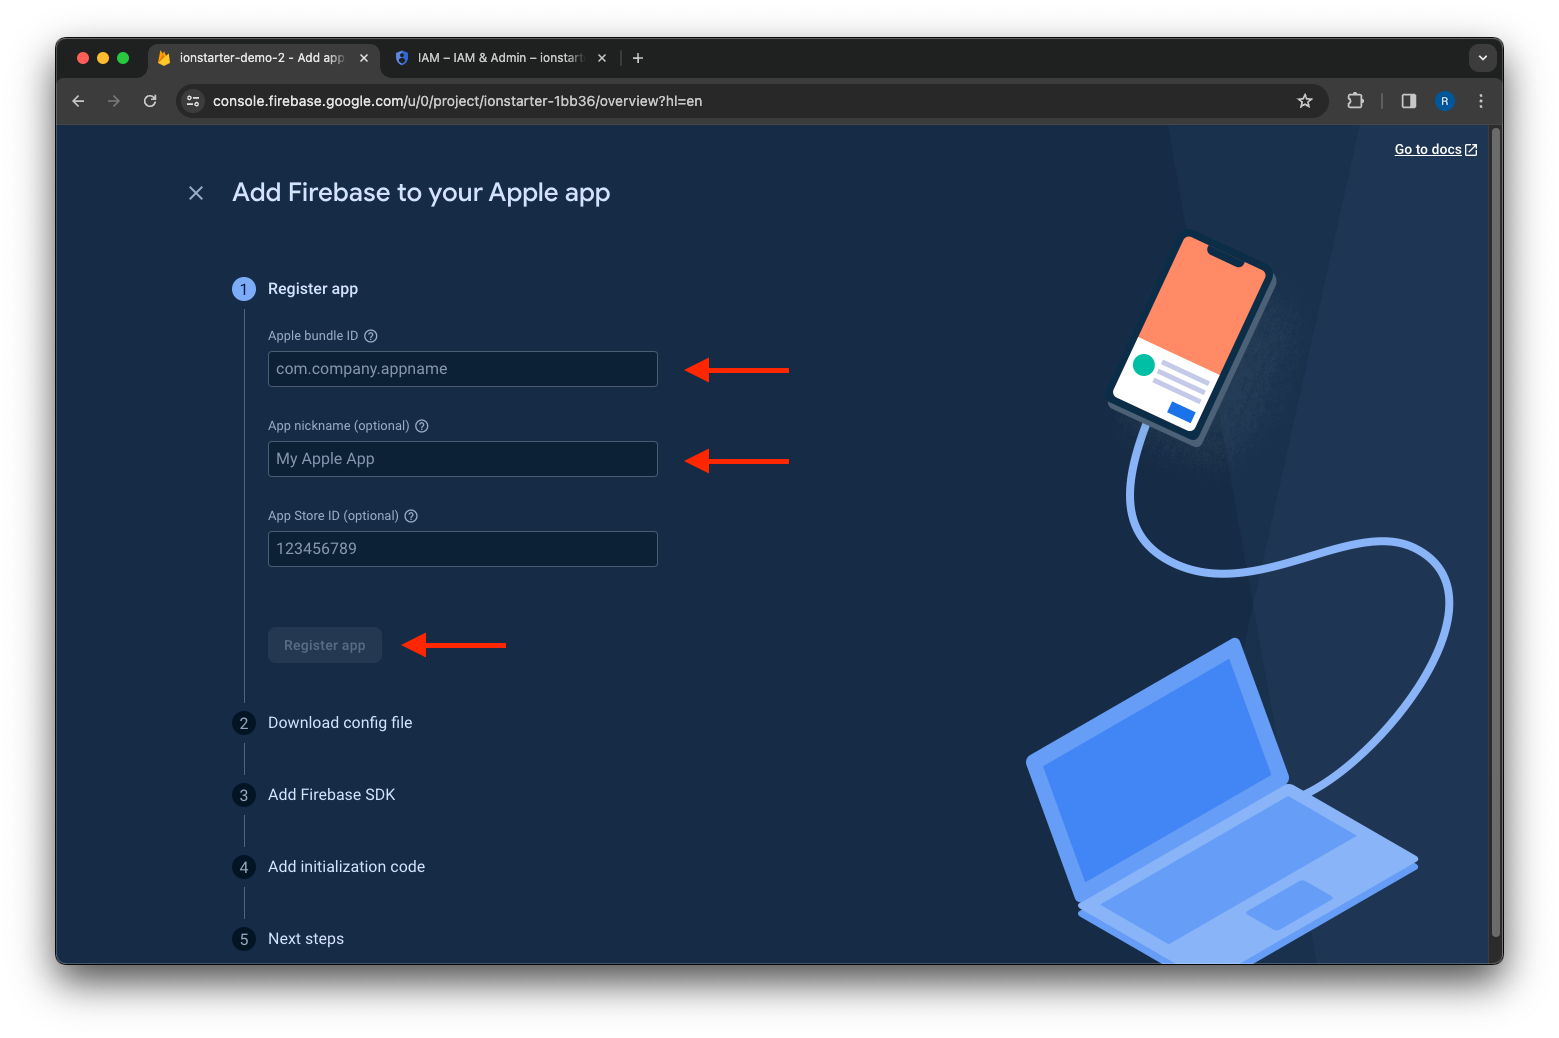
Enter the following details and click Register app:
-
iOS bundle ID: The bundle ID of your iOS app (e.g.
com.example.myapp) as defined in thecapacitor.config.tsfile: -
App nickname: A nickname for your app (e.g.
My App).
The next step is to download the GoogleService-Info.plist file and move it into the ios/App/App directory of your app.
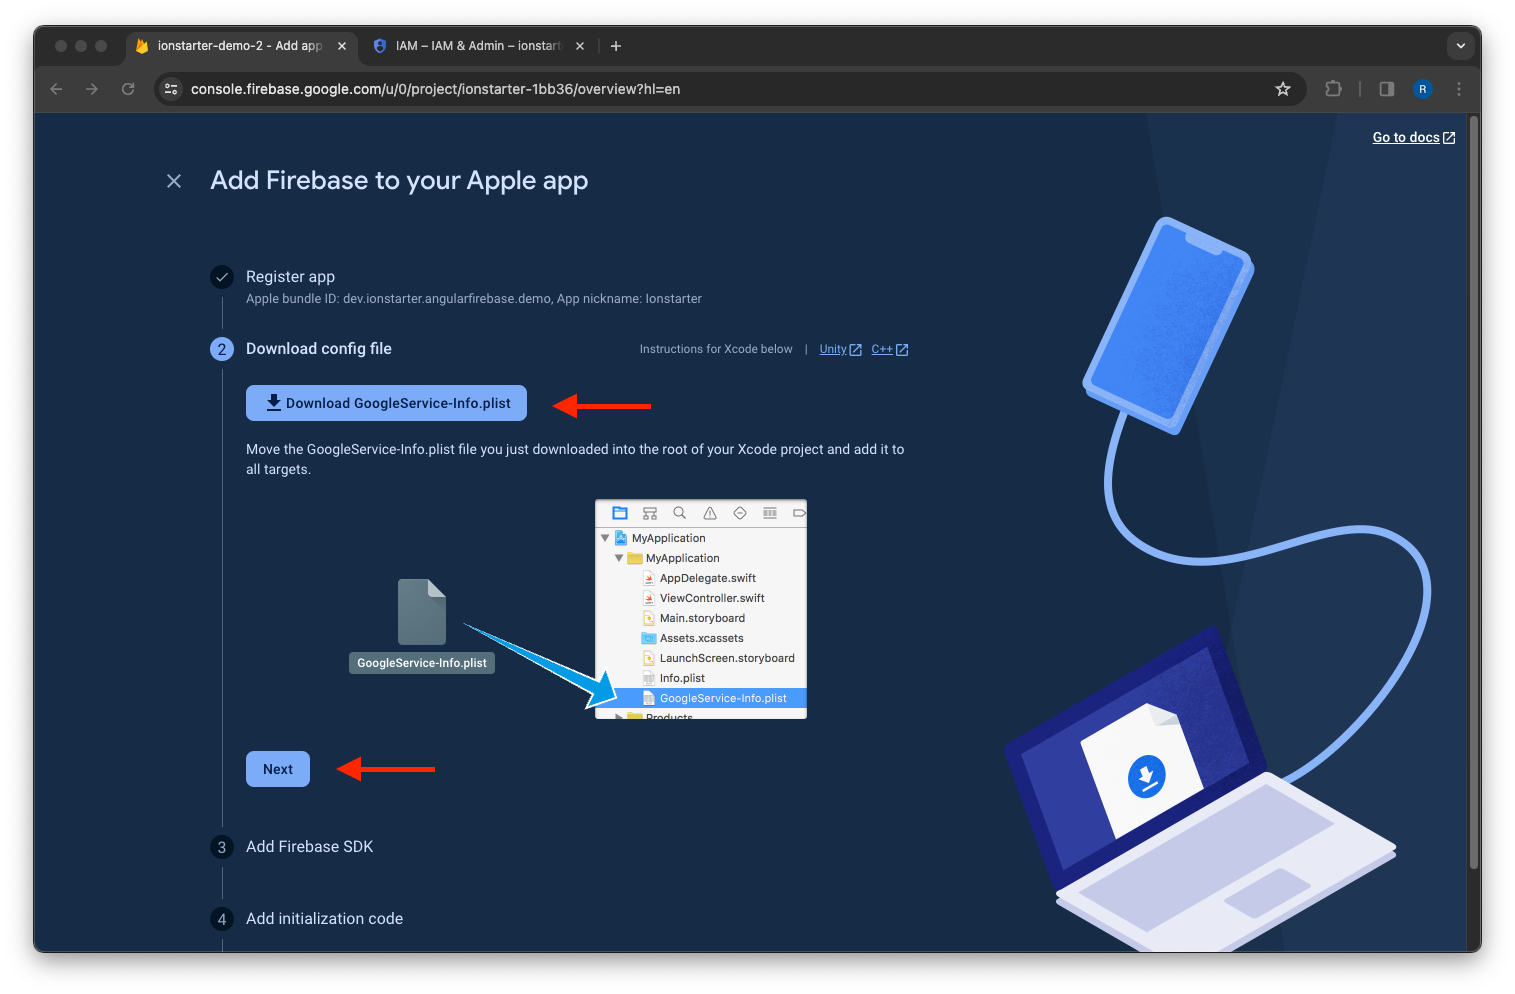
After that you are done. The rest is already configured in the starter template. Click on Next twice and then on Continue to console.
Cloud Messaging
Register the App ID
If you have not yet registered your App Identifier with Apple, log in to your App Store Developer Account and navigate to Identifiers. Add a new App Identifier and make sure that you select the Push Notifications capability.
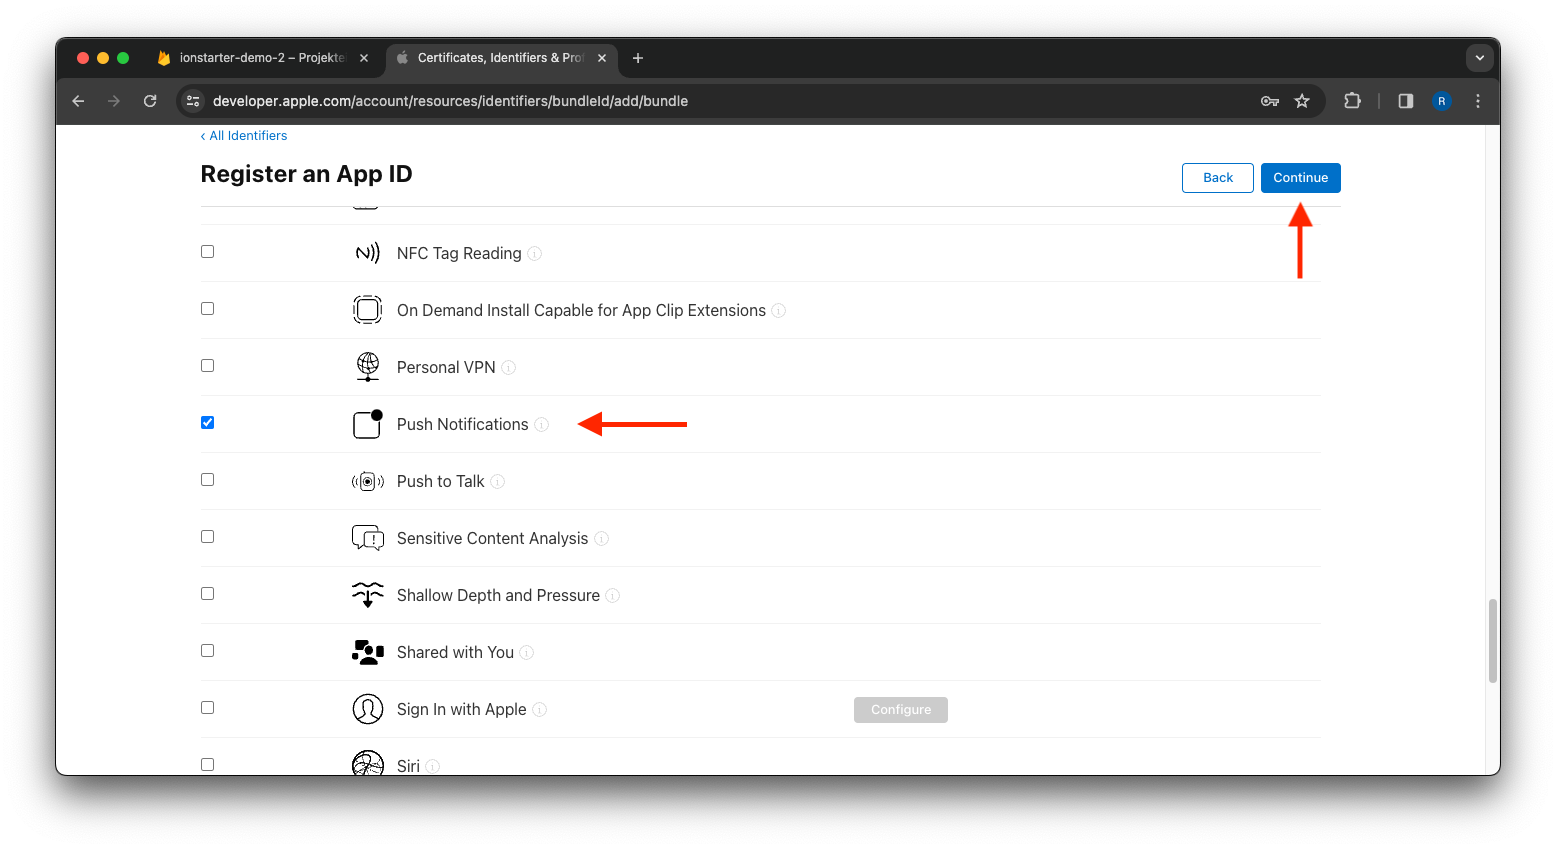
Enter the appId from the capacitor.config.ts as bundle ID. Click on Continue and then on Register. Your App Identifier is now registered with Apple.
Create an APNs certificate or key
Next, navigate to the Keys page and click the to add a new key.
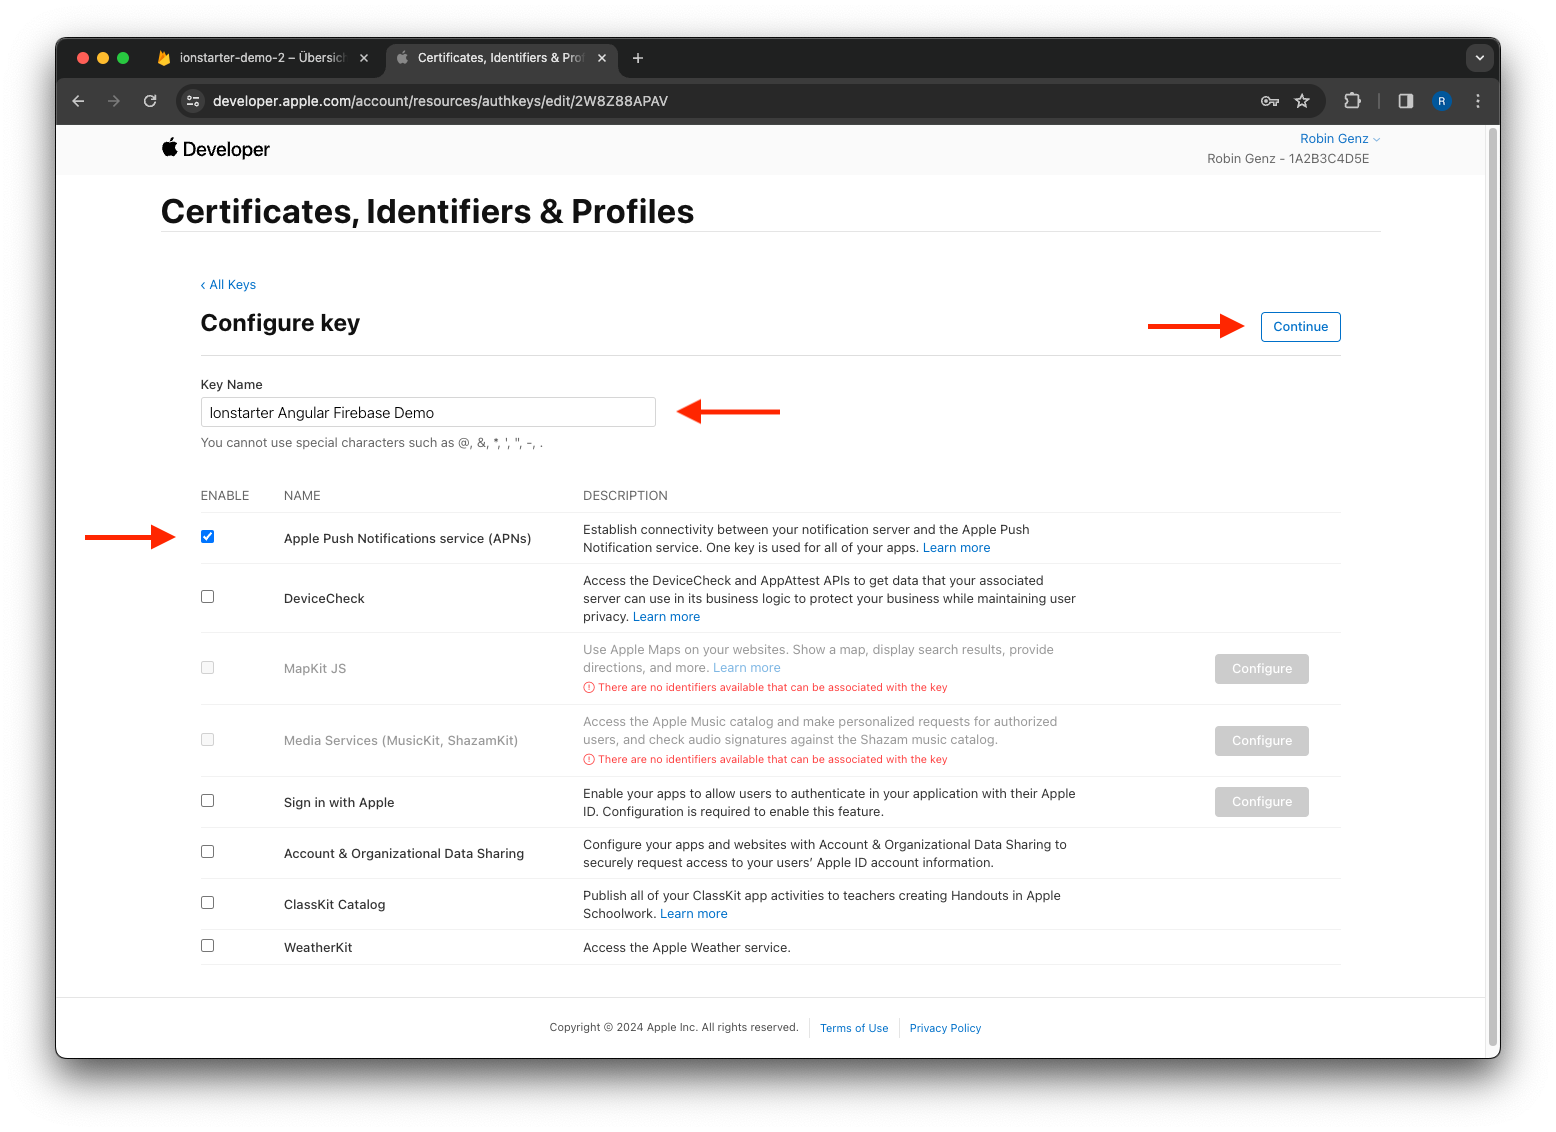
Enter a name and enable Apple Push Notifications service (APNs). Click on Continue and then on Register.
Next, download your key and write down the key ID.
Usually the Key ID is also included in the filename of the downloaded key.
After download, you need to upload the key in the Messaging Tab of the Firebase Console.
Click the Upload button, select your key, enter your Key ID and your Team ID and upload the key to Firebase.
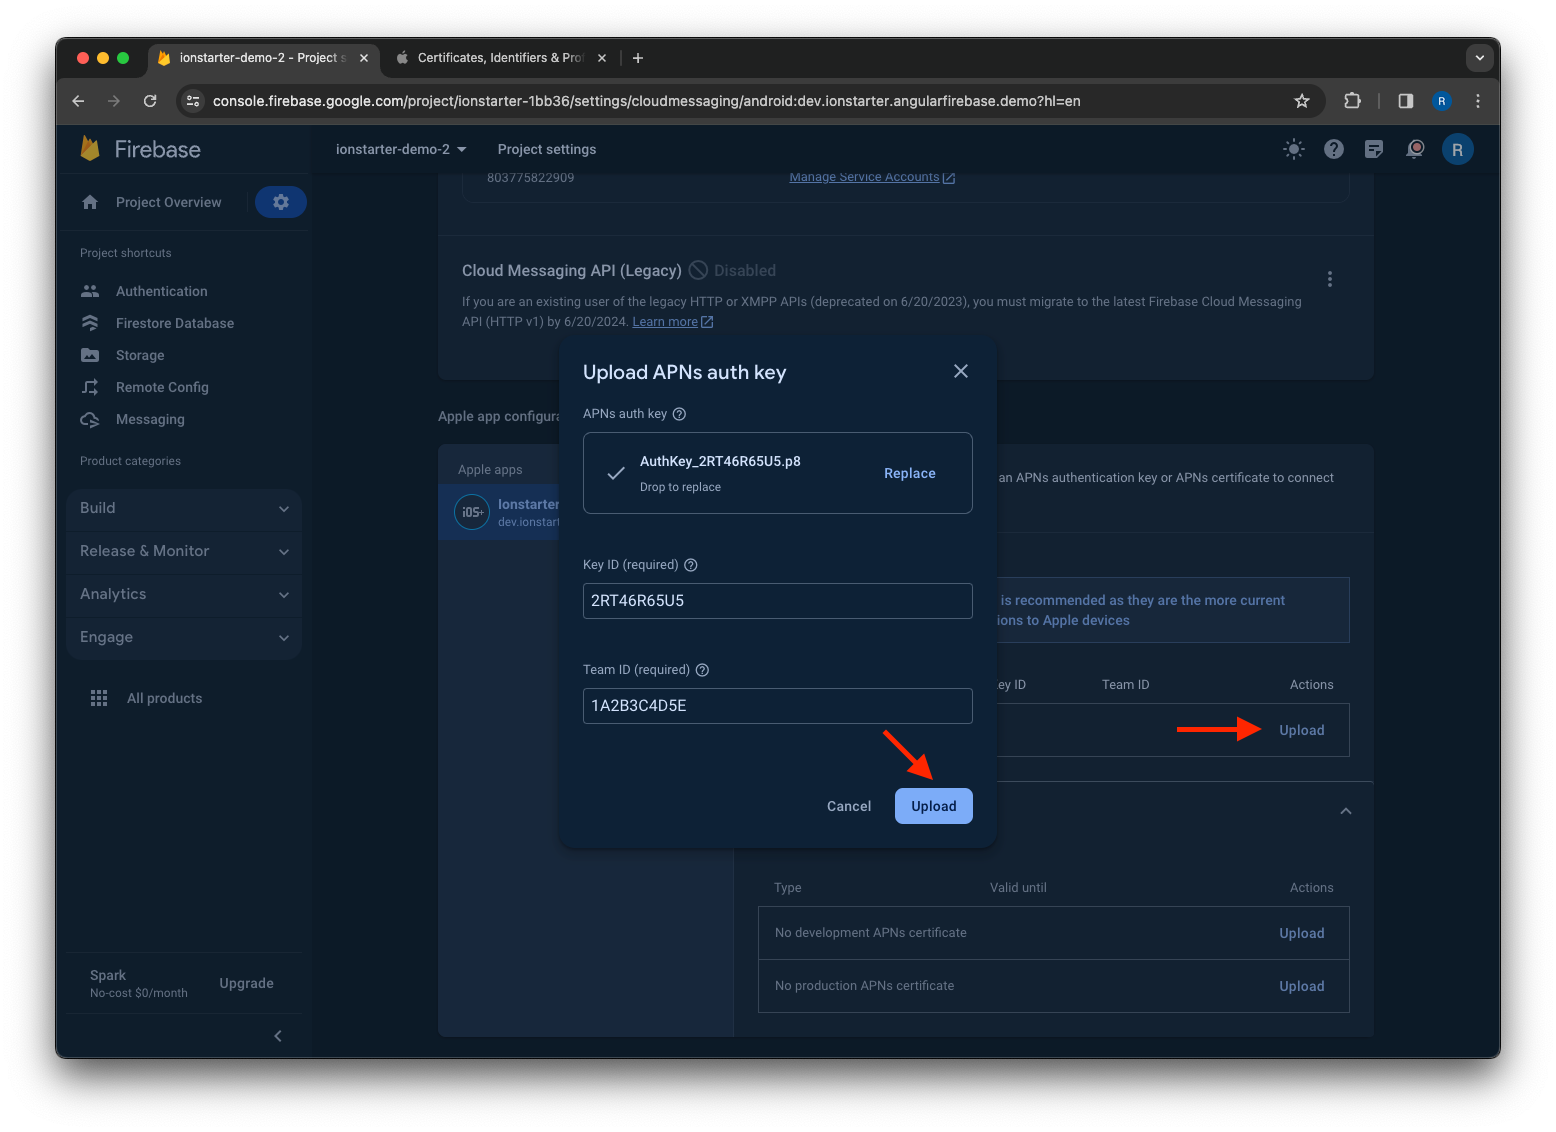
You can find the Team ID in your Membership details.