Getting started
This guide will help you get started with the Ionic Starter using Angular and Firebase.
Prerequisites
Before you begin, make sure your development environment meets the following requirements:
- Install Visual Studio Code (latest version)
- Install Git (latest version)
- Install Node.js (latest version) which includes the Node Package Manager
- For Android development:
- Install Android Studio (latest version)
- For iOS development:
- Install Xcode (latest version)
- Set up a paid Apple Developer Account
Create a repository from a template
After your purchase, you will receive an email with a license key to activate. Visit https://ionstarter.dev/activate to activate your license with your GitHub username and license key, you will be invited to the private GitHub repository.
Now follow the steps below to create a new repository from the template:
- Navigate to the GitHub repository page.
- Above the file list, click
Use this template.
- Select
Create a new repository. - Select the owner for the repository and enter a name for your repository.
- Make sure the repository is private and click
Create repository.
Next, clone the repository to your local machine, navigate into the project root and run the following commands:
That's it! Read on to learn how to set up Firebase.
Set up Firebase
While the Firebase SDKs are already added to the app and configured, you still need to perform a few manual steps to connect the app to your Firebase project.
Create a Firebase project
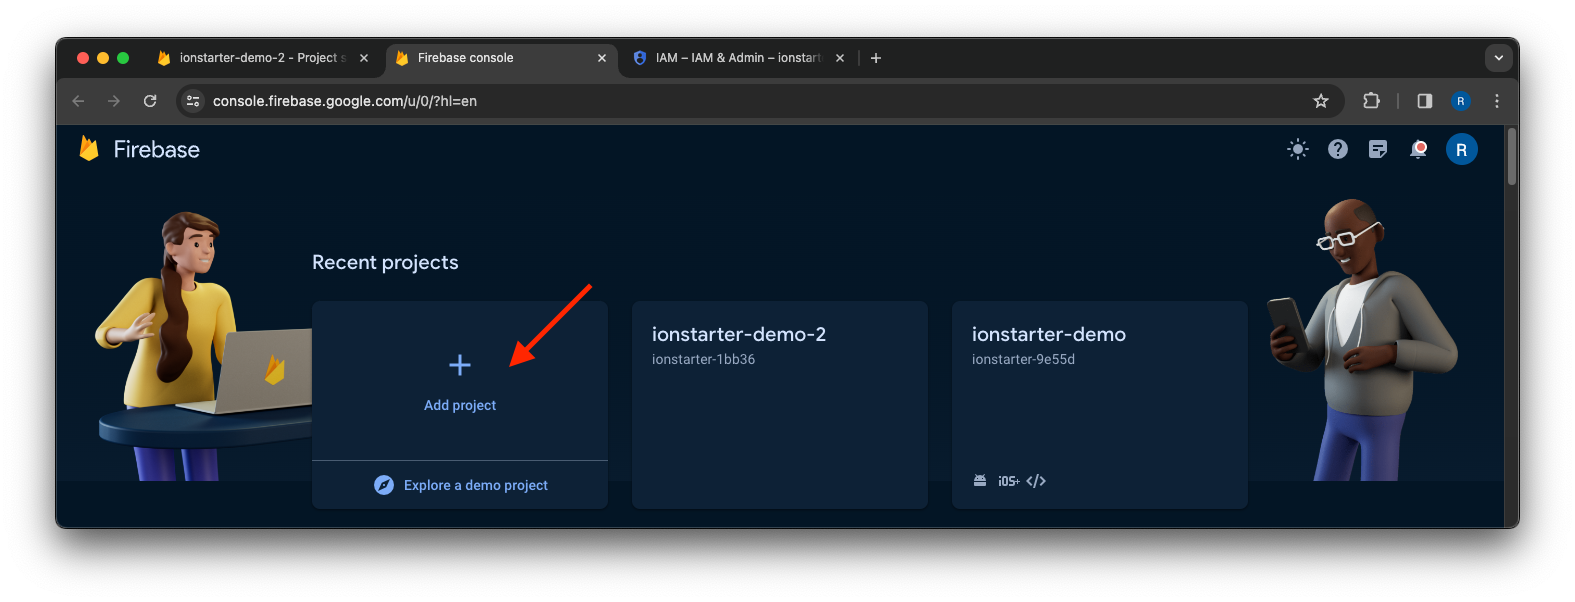
If you don't have a Firebase project yet, create one in the Firebase console.
Click Add project, then follow the on-screen instructions to create a Firebase project.
Authentication
This starter template supports various authentication providers. However, only password authentication is enabled by default.
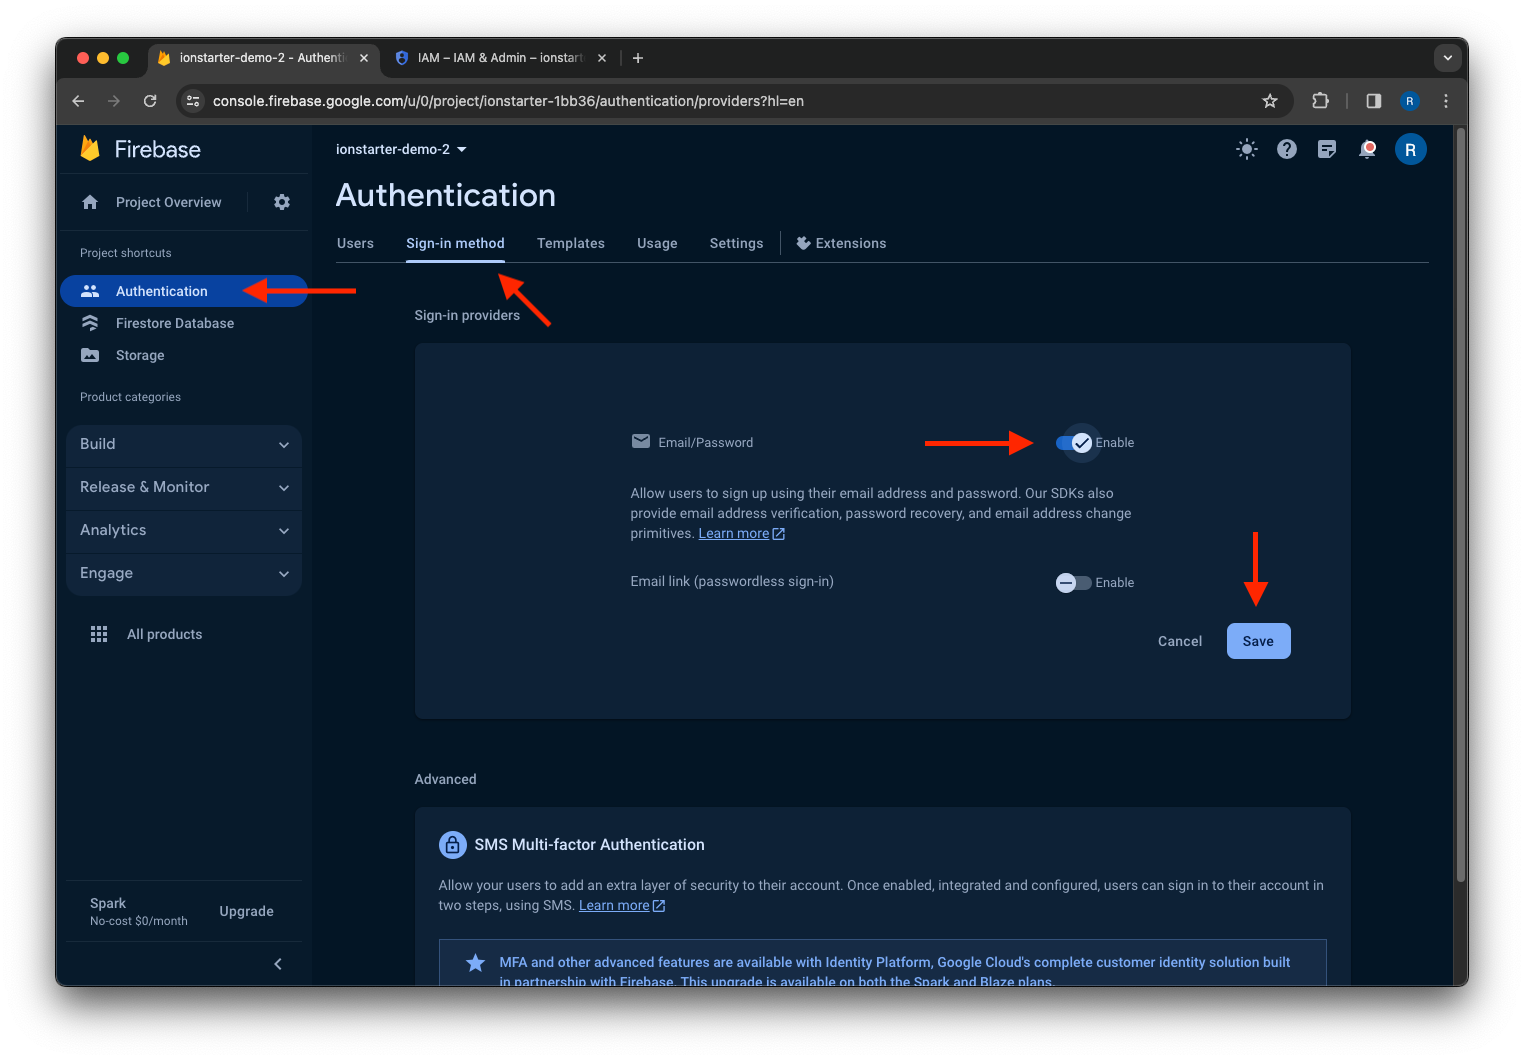
Enable password authentication
Open the Authentication product in your Firebase project and click the Get started button. After that, click the Email/Password provider and enable it.
Cloud Firestore
Create a database
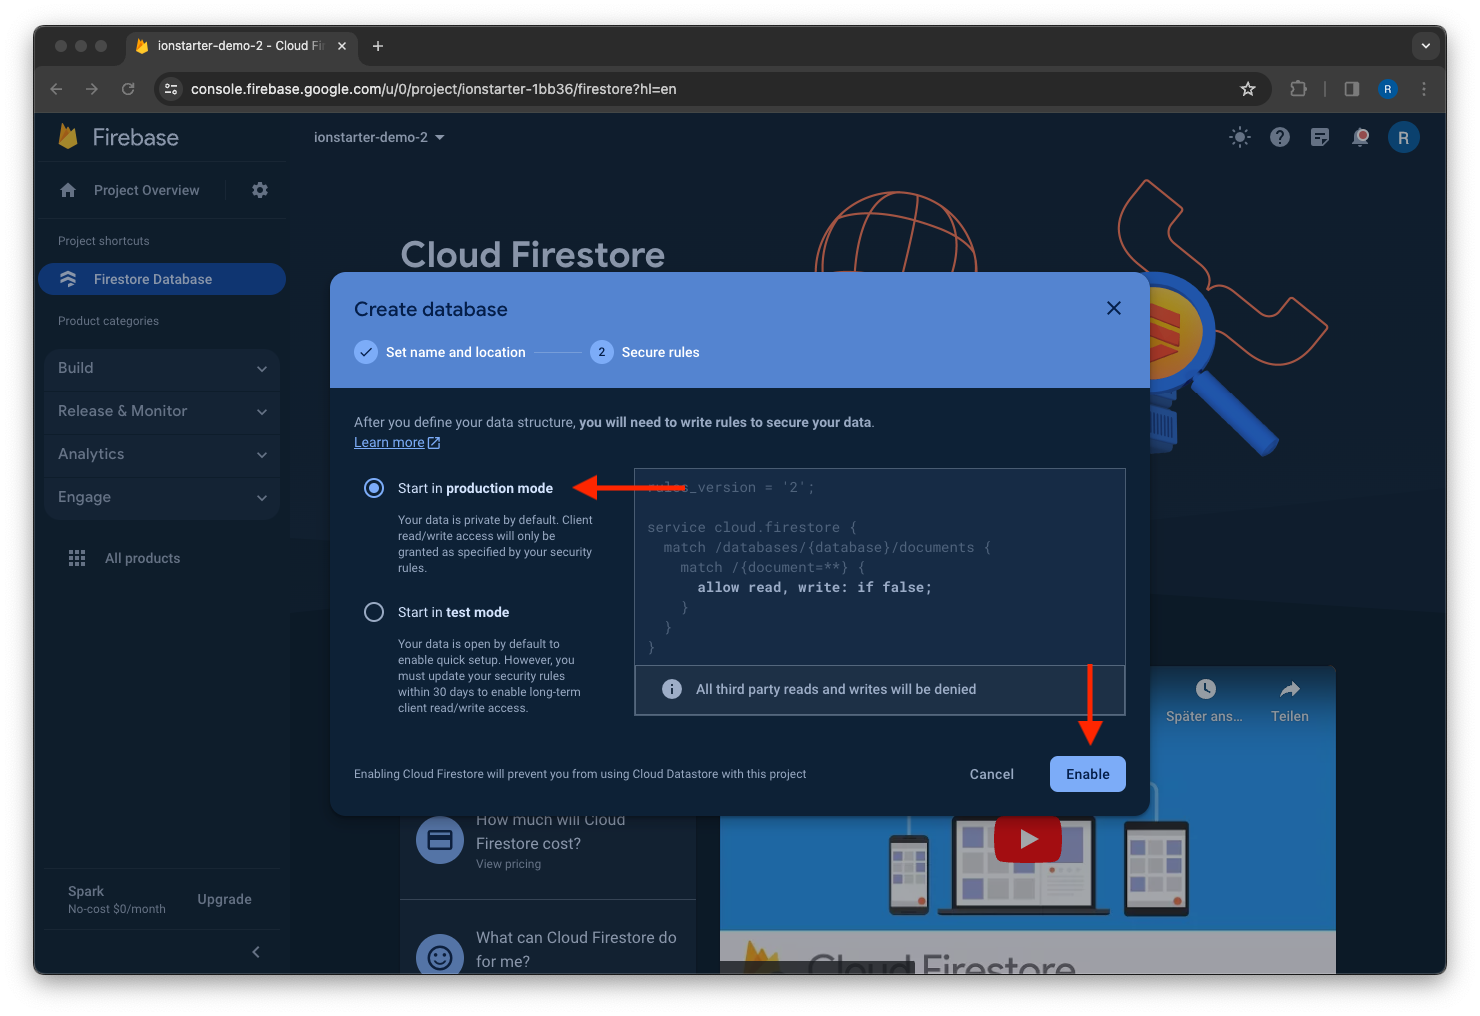
Open the Firestore Database product in your Firebase project and click the Create database button.
Select a location for your database and click Next.

Select a starting mode for your Cloud Firestore Security Rules and click Enable.
Enable rules deployment
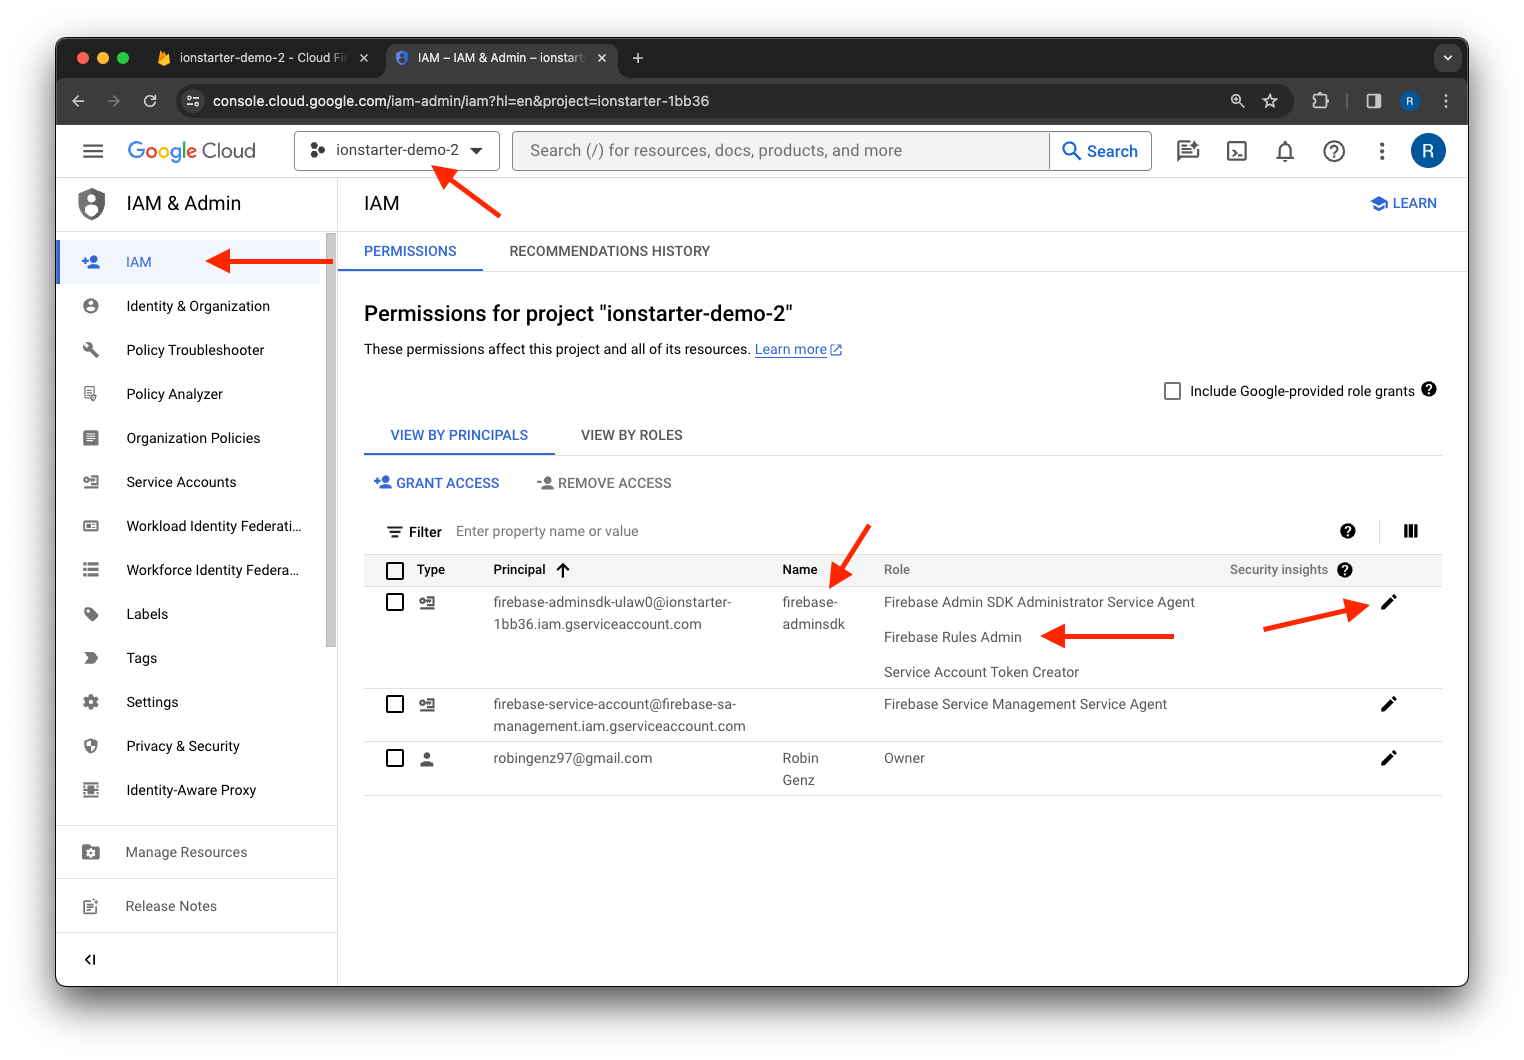
In order for the Firestore Rules to be automatically deployed via a CI/CD pipeline, changes must be made to the service account permissions. To do this, follow the steps below:
- Navigate to the IAM section of the Google Cloud Console.
- Make sure that the correct project is selected via the project selection in the toolbar above.
- Edit the principal of the service account with the name
firebase-adminsdk. - Click
Add another roleand select theFirebase Rules Adminrole. - Save the changes.
After that, it should look like this:
Cloud Storage
Create a bucket
Open the Storage product in your Firebase project and click the Get started button.
Select a starting mode for your Cloud Storage Security Rules and click Next.
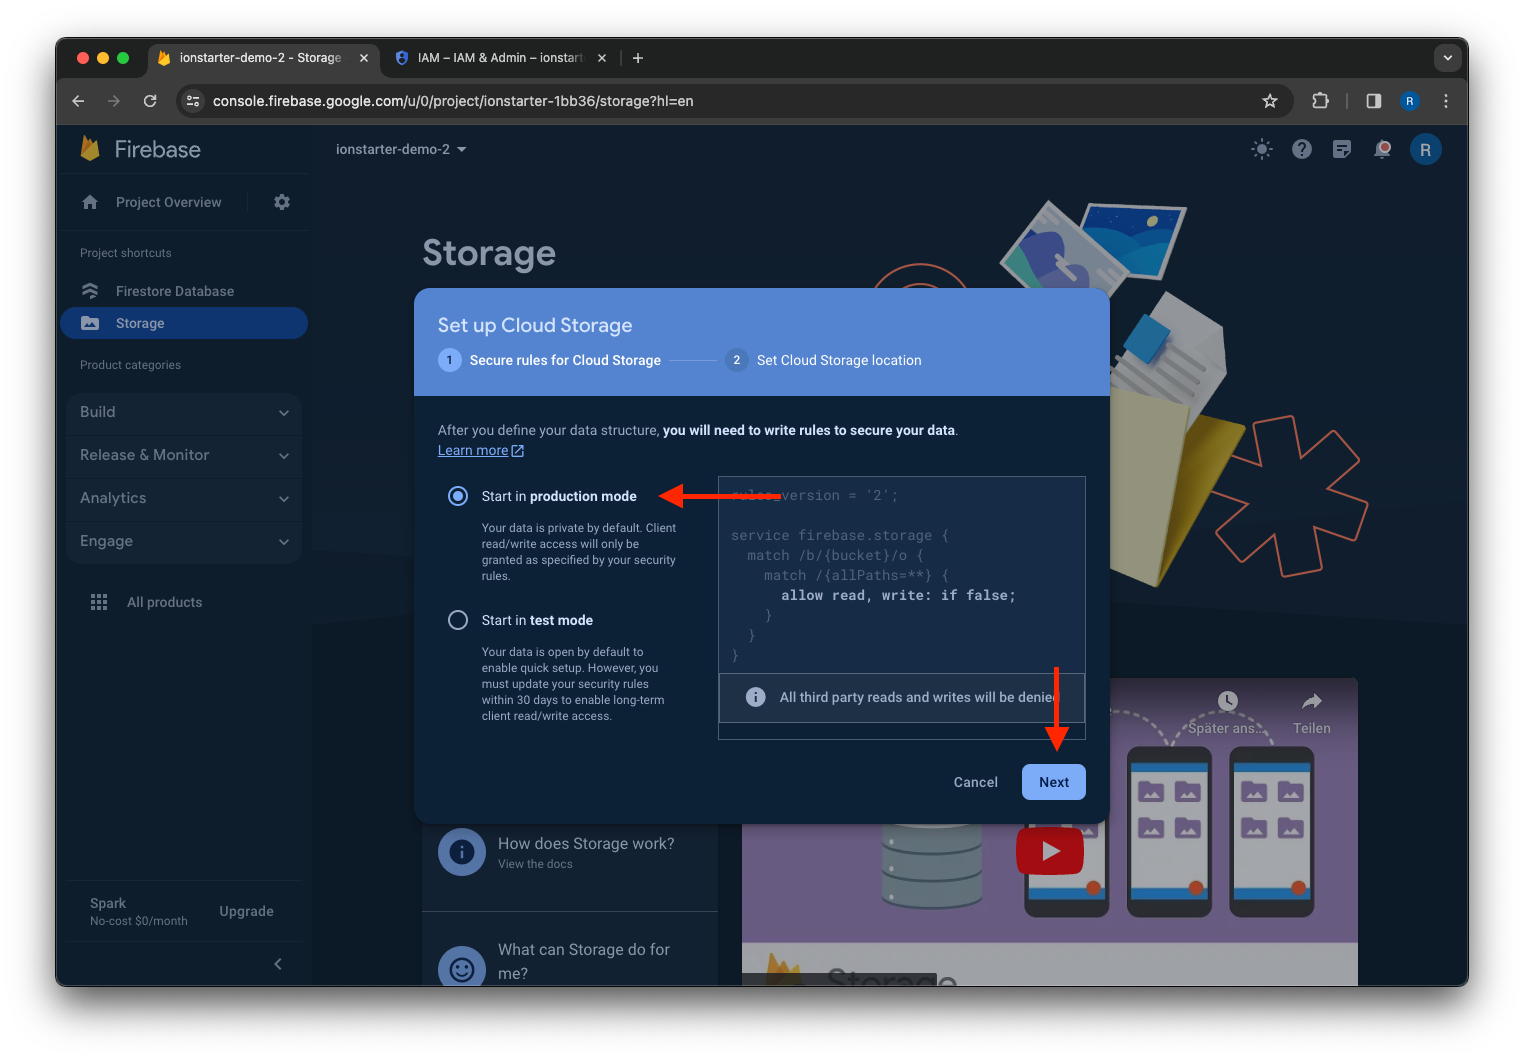
Then click Done.
Enable cross-service communication
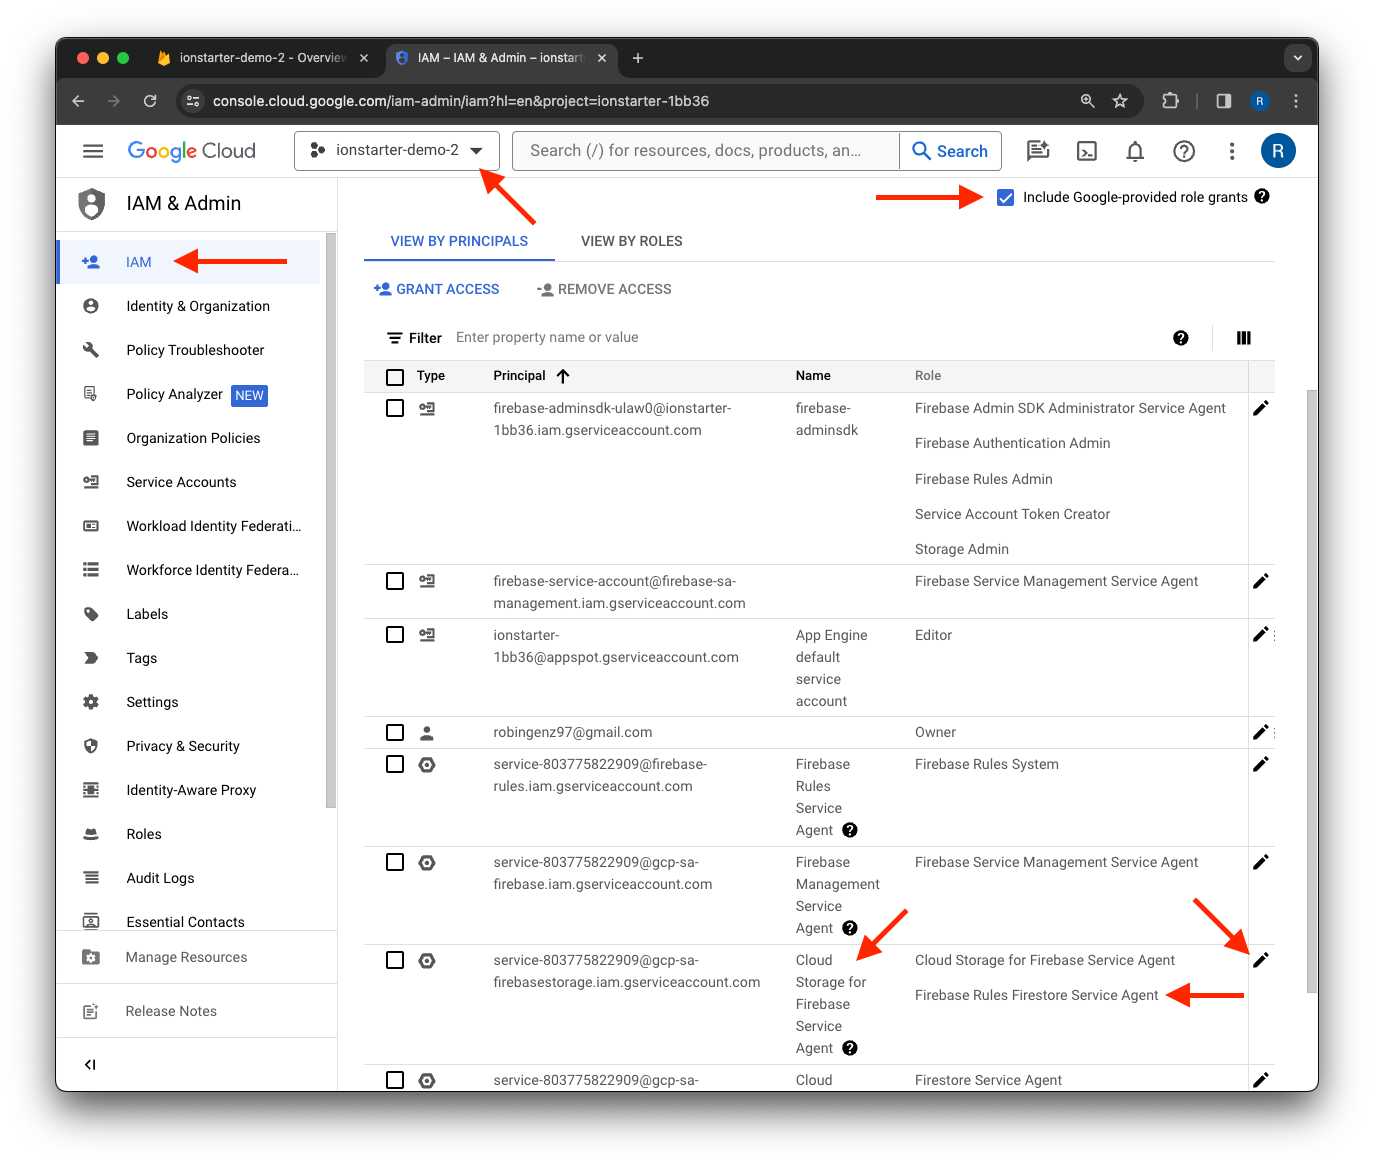
In order for Cloud Storage to access the Cloud Firestore data, cross-service communication must be enabled.1 To do this, follow the steps below:
- Navigate to the IAM section of the Google Cloud Console.
- Make sure that the correct project is selected via the project selection in the toolbar above.
- Set a check mark at
Include Google-provided role grants. - Edit the principal of the service account with the name
Cloud Storage for Firebase Service Agent. - Click
Add another roleand select theFirebase Rules Firestore Service Agentrole. - Save the changes.
After that, it should look like this:
CORS configuration
Follow the instructions in the Firebase documentation to configure CORS for Cloud Storage.
Add Firebase to your app
Last but not least, you need to add your Firebase project to the app. To do this, follow the platform-specific instructions on the following pages:
Run the app
Now that you have set up Firebase, you app should be ready to go. To start the local development server, navigate into your project root and run the following command:
Navigate to http://localhost:4200/ in your browser to see the app running.
Take a look at the Development page to learn more about the development workflow and how to run the app on a mobile device.